Using a Raspberry Pi as a distcc node
19 Apr 2019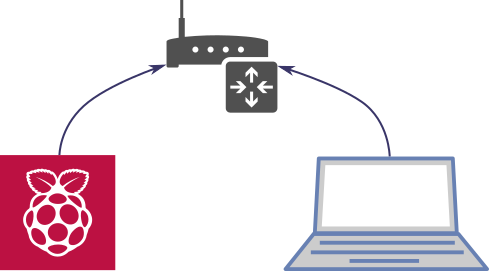
The basic premise behind this one is simple - can I use my Raspberry Pi to help speed up compilation tasks done on my laptop? To do this, I’ve set up a cross-compiling toolchain and distccd instance on my Raspberry Pi, and configured my laptop to use the Raspberry Pi as a distcc server. Does it work? Sort of…
crosstool-NG
The first step is to obtain a cross-compiling toolchain to run on the Raspberry Pi. This is because we’re targeting the x86(-64) architecture instead of ARM. Usually, you’d be looking at making a cross compiler to compile code for the Rasberry Pi, but we’re doing the opposite.
To do this, I’ll be using crosstool-NG to make the toolchain. I did see some packages and mention of cross-compiling that looked semi-related, but I didn’t actually see anything on Raspbian specifically for this task.
Ideally, the toolchain should exactly match the gcc version that you’ll be using locally, otherwise you might run into compatibility issues. Unfortunately, the current version of crosstool-NG doesn’t support targeting any version of GCC that actually matches the distro provided compilers on Ubuntu (18.04). So I’ll just be picking something that matches close enough and hope it works.
I also found this link on how to build the cross-compiler on the Raspberry Pi. It was pretty useful, but the prebuilt toolchain is a bit old now, and I have no patience for building it on my Pi, so I’ll take another approach. I’ll compile the cross-compiling toolchain for the Raspberry Pi on my laptop - a Canadian Cross build!.
To perform this build, we’ll actually need another cross-compiling toolchain - one that runs on the laptop and generates executables that target the Raspberry Pi. Again, I have no time to build this myself, so I’ve used the prebuilt cross-compiler found here (specifically the GCC 6.3.0 variant).
Here are the rough steps:
- Download and install crosstool-NG in the usual manner (
./configure && make && sudo make install) - Download a prebuilt cross-compiling toolchain for the Raspberry Pi (I’m targeting a Raspberry Pi 3, and used this one)
- Add the prebuilt cross-compiling toolchain into your
PATHvariable - Run
ct-ng x86_64-unknown-linux-gnu -
Run
ct-ng menuconfig. For the configuration options, I chose options to best match the system GCC on Ubuntu 18.04:- Set the build type to ‘Canadian’ and set the host triplet to
arm-linux-gnueabihf - Matched the binutils to 2.30
- Matched libc to 2.27
- Chose GCC 7.4.0 (hopefully this works with GCC 7.3.0)
- Added the
--enable-default-pieoption when building GCC (otherwise I’d always have to specify-fPICwhen compiling, as I found out later) - Diabled building gdb - when doing a Canadian Cross build, it otherwise errors out with an obscure error about needing to set up some Python wrapper. Oh well, I didn’t need that anyway.
- Enabled saving intermediate steps. this allows you to re-start the process from a later stage, if something fails.
- Set the build type to ‘Canadian’ and set the host triplet to
- Run
ct-ng buildand wait for it to finish. The output will be under~/x-tools. You can configure this frommenuconfig, but initially I didn’t realise that, and was confused as to where it actually dumped everything.
Going one step further
I don’t have the fastest laptop in the world, so I’d actually not like to build this on my own machine. Luckily it’s actually pretty easy to get all of this done by leveraging freely available CI options. For this, I went with Azure Pipelines. Both Travis and AppVeyor (what I normally use) are out of the question - they have build time limits in the region of 1 hour, but this build will likely take longer than that. Luckily, Azure Pipelines has some pretty generous build limits - the max build time limit is 6 hours! More than enough time for this to build.
Azure Pipelines is fairly new, and I find the interface a little confusing, but in the end, it does everything that I need. From a purely technical perspective, I’d say it’s actually superior to both of the other aforementioned CI options.
This repo does exactly that. It builds the full toolchain on Azure Pipelines and spits out the artifact, which I can then download and use. And it only takes slightly over an hour to build. Easy. The run.sh script is also a good reference to all the steps required and mentioned earlier. The only other thing worthy of mention is that I pregenerated the required .config. Most importantly, turn off the progress display (another menuconfig option), otherwise the CI log will be full of garbage.
Setting up the Raspberry Pi
Now that we have the required cross-compiling toolchain, we need to set it up so that it will work with distcc.
-
Download and install the cross-compiling toolchain that was built:
1
2
3
4
5
6
7
8
9
10
11
curl -LJO https://jtanx.visualstudio.com/_apis/resources/Containers/2574465?itemPath=ReleaseToolchain%2Fx-tools.tar.xz
tar axf x-tools.tar.xz

# Yeah this could have been named better
cd home/vsts/x-tools/HOST-arm-linux-gnueabihf/x86_64-unknown-linux-gnu/bin

# Create the un-prefixed symlinks for distcc to use
for f in *; do echo $f | cut -d- -f5- | xargs -I{} sudo ln -s $f {}; done

cd ../..
sudo mv x86_64-unknown-linux-gnu /opt
This installs the toolchain into /opt/x86_64-unknown-linux-gnu. I’ve also created symlinks so that instead of calling
x86_64-unknown-linux-gnu-gcc, I can just callgcc. This is important for distcc, as it just executesgccbased on how itsPATHhas been configured. -
Install distcc
1
sudo apt-get install distcc
-
Configure distcc - edit
/etc/default/distcc1 2 3 4 5 6 7 8 9 10 11
# Set to true STARTDISTCC="true" # Set to your LAN subnet ALLOWEDNETS="192.168.0.0/24" # Configure the max number of jobs JOBS="6" # Set the working folder. TBH I don't think this does what I want DISTCC_DIR=/tmp/distcc
-
Edit
/etc/init.d/distccto modify the PATH1 2
# Ensure our cross-compiler is at the front PATH=/opt/x86_64-unknown-linux-gnu/bin/:/usr/local/sbin:/usr/local/bin:/sbin:/bin:/usr/sbin:/usr/bin
-
Restart. Check distcc is up with
systemctl status distcc
Setting up the host
-
Install distcc
1
sudo apt-get install distcc
-
Configure the DISTCC_HOSTS environment variable. For example, if your Raspberry Pi was reachable on 192.168.0.100:
1
export DISTCC_HOSTS="192.168.0.100"
-
When configuring for a build, set CC/CXX to use distcc, e.g.
1
CC="distcc gcc" CXX="distcc g++" ./configure
-
Run make/the build. If everything succeeded, you should see the Raspberry Pi start compiling code. If you see ‘failed to distribute’ messages, something went wrong.
Does it work? Yes. Luckily the GCC 7.4.0 target works ok with the GCC provided by Ubuntu (7.3.0). Is it any better? That’s questionable. We can definitely distribute the workload over more cores, but in general, there’s less compute power available on the RPi, and there is a penalty involved in serialising all of this over the wire for distribution. At the least, I found it hard to max out CPU usage on the RPi, even with a high job count, so there’s probably some other bottleneck in there.
It also depends on the workload - this would probably fail spectacularly if I were compiling C++, in part because of the memory limitations on the RPi, but also because there’s stricter requirements on making sure that the compilers match.
A quick time comparison on a meson build of FontForge:
-
No distcc (and no ccache):
1
2
3
real    2m54.159s
user    4m36.506s
sys     0m26.808s
-
With distcc (-j8):
1
2
3
real    1m57.521s
user    0m59.777s
sys     0m16.003s
So some improvement, but nothing spectacular. It sure was a fun what-if experiment though!
Comments